Tips and Tricks Thursday
Can you believe it is Thursday again? I think every week goes by faster and faster. I hope that you've been out there playing with your camera and its settings. I hope last weeks lesson helped you to understand ISO a little bit better. I used the ISO function a lot in my recent ballerina session. We shot inside a dance studio and part of the session I used only my flashes. To capture movement I had to crank my ISO way up in order to get a high enough shutter speed. Today we will discuss how aperture and shutter speed work hand in hand with ISO to get the proper exposure.
Chapter 2: Manual Mode Settings
Part C: Aperture, Shutter Speeds, and ISO- hand in hand
I know we have touched briefly on aperture and shutter speed separately but today I want to explain how they go hand in hand with ISO.
If your camera will allow you to set both aperture and shutter together you will be able to have better results in proper exposure of your images. Before we talked about using TV (S) and AV (A) modes but that only allowed you to set one or the other but not both together. Both work hand in hand. If any of you have seen me during a session you have seen my fingers moving constantly on my camera. This is due to changing the shutter or aperture or both to get different effects on what I'm trying to achieve. I also change my focal points constantly and I will explain that more next week.
But first, lets talk about your camera and how to tell when you are properly exposed. If you look in your eye piece you should see down at the bottom a bunch of lines with an arrow in the middle. When you dial either your aperture or shutter you should see a blinking, thicker line that moves as you dial. The goal is to get the blinking, thicker line lined up in the middle. All camera's are different in what you see in your eye piece but they are all very similar.
Here is an example of the back of a Canon XSI. The red circled area is what you should see inside your camera when you look through the eye piece.
The dark, thicker line is right in the middle, which means this image should be properly exposed. Now there are situations, especially on a bright sunny day when that middle point will change depending on where your focus is. But we will get into that in a later lesson. For now we will just work on getting a properly exposed image by making sure that darker line is lined up in the middle.
The most important thing to do when you are changing both the shutter and the aperture is to think about what you are attempting to capture.
I will give some examples...
Example 1: Action
Lets say you are wanting to capture movement. It could be a sport image, children playing, an animal moving, etc... If you want to capture the image without a lot of blurring then you would want to set the shutter speed first. With any type of movement you want to have a shutter speed of 250 or higher in order not to get blur. In sports the higher the better. But often times in sports you are in an inside building with not a lot of light. Then you have to really work at getting the proper exposure using your f-stops and ISO. To do this, you would set your shutter to 250 and then a higher ISO (because that will allow a little more light to filter in even with a quick shutter) and then using the dial, change your f-stops until the dark line is centered in the middle. Now be careful too because the lower the f-stop number the more depth of field you will get and the less will be in focus. If you are wanting to capture a couple basketball players going up for the basket you would want them to be in focus. So you would need to maintain a higher f-stop of 6.3 or higher. If you were to only use a 4.0 or even lower, only the spot where your focal point is will be in focus. If you are unable to get a higher f-stop centered in the middle, then crank up the ISO even more.
Here is an example from a recent session I did. I wanted to keep a little motion going in her skirt as she twirled, but I kept the focal point on her face so that her face stayed in focus. Because I wanted only her face to be in focus I was able to keep the f-stop a little lower. But also notice my ISO is cranked to 1600, which will create noise. But I didn't mind the noise. I think it adds to the feel of the image.
Here are my camera settings... ISO 1600, Shutter 250, F-stop 5.6
Example 2: Big depth of field
You want to really focus on the subject, but blur out the background. This would be helpful for images where there is a lot going on in the background, like a child playing at a playground with multiple other children. Or a detail that you want to single out in the image. If you are wanting a big depth of field, you want to start by setting your f-stop. The lower the number the more depth of field you will have. Every lens is different on how low you can go on your f-stops. But depending on how much of a depth of field you want depends on how low you go. Once you set your f-stop than dial the shutter speed until it reaches the center of the line.
Here is an example from the same session using the low f-stop to capture a good depth of field.
My camera settings are:
ISO 500, Shutter 100 and F-stop 4.0
Example 3: Group shots
What if you want EVERYTHING in focus in the image? Great example of this is if you are doing a group shot. You don't want just one person in focus. You'll want everyone in focus. So in order to achieve this you need to have a higher f-stop. If you are shooting 4 or more people you will want to have your f-stop 8.0 or higher. When I shoot a wedding and do group shots, I will keep my F-stop at 10 or higher just to make sure everyone is in focus. Do not use a low F-stop on group images or you will be disappointed. Also watch your shutter speeds. Anything lower than 125 can be tricky with a group shot. Good rule of thumb with hand holding a camera is never go lower then 80 shutter speed. With 60 and lower try to use a tripod to keep your camera steady or you will get blurring.
Here is an image I did this past fall for a family.
My settings were: ISO 640, Shutter 160, and F-stop 8.0.
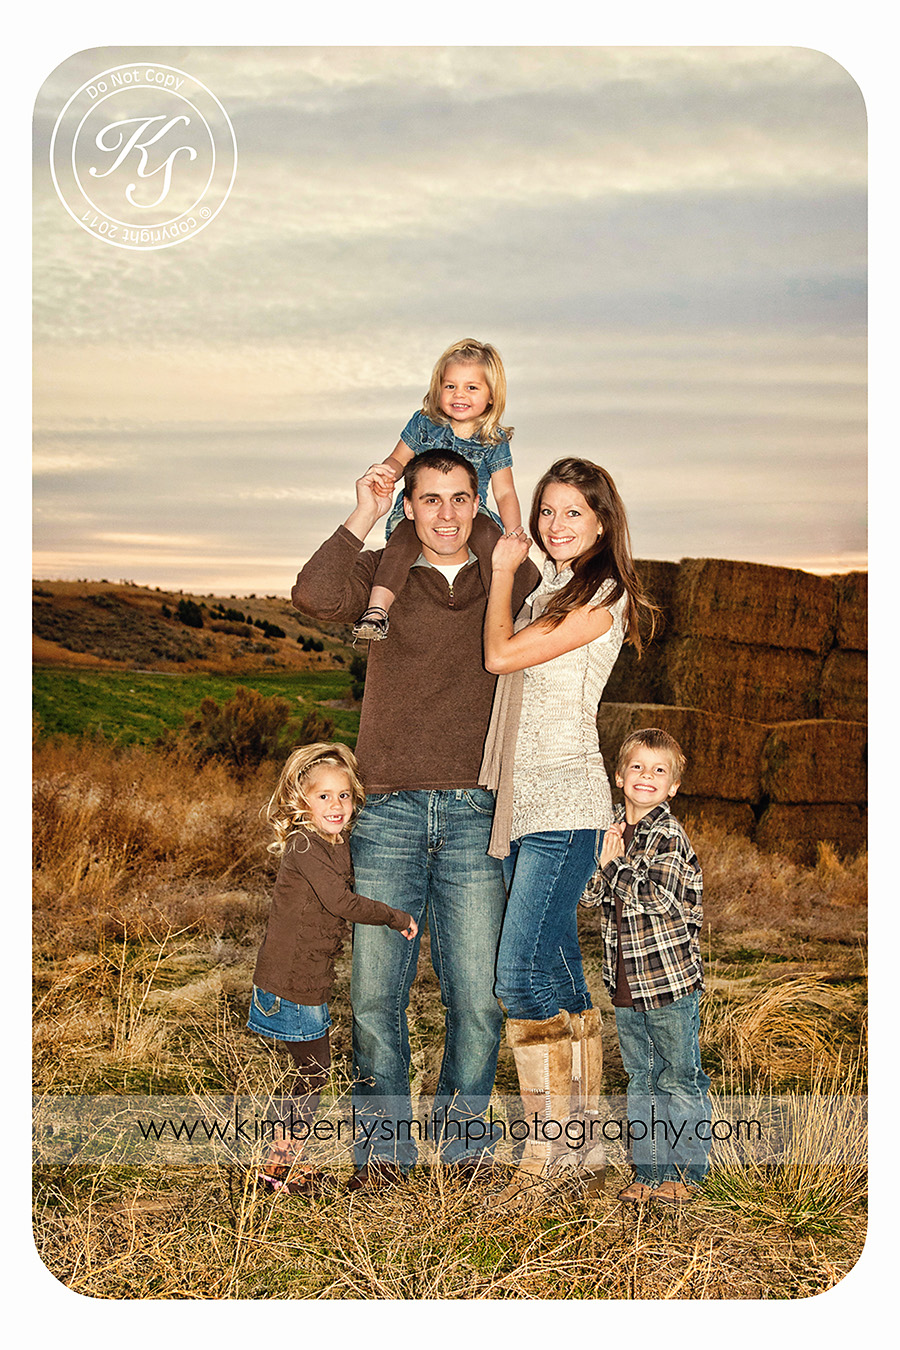 Notice how everyone is in focus. When I am shooting any group I want to make sure that they are all in focus.
Example 4: Landscape and wildlife images
When trying to figure out your settings for landscape or wildlife images make sure to be aware of movement, lighting, whether you want it to be all in focus or if you want a particular thing in focus. Determine what you are looking for and then set your settings accordingly. If it is a bright day and you want it all in focus you may end up setting your shutter speed high, your f-stop high and your ISO low. If it is an overcast day and not very bright, you will want a lower shutter speed but a middle f-stop (8.0+) to still keep everything in focus and adjust ISO accordingly. If you are shooting wildlife that is moving you need to have a high shutter speed to capture the movement and a middle ground F-stop (8.0+) and then change ISO to get it exposed properly.
Here is an image using the example of high shutter, high f-stop and low ISO. This image was taken last month in Kentucky. I absolutely LOVE old barns and silos. This silo was so cool I just HAD to take a picture of it.
My settings were- shutter 1000, f-stop 9.0 and ISO 320.
So, as you can see from this lesson, in order to fully shoot manual and get AMAZING pictures, you need to know how shutter, aperture and ISO all work together to create a correctly exposed image. Now get out and go try it out. Put it on manual and dial away!!! The more you do it the more it'll make sense. And the more you do it, the more it becomes second nature. I don't even "think" about it now. I just start turning dials. And so can you!!!
As always... if you have any questions feel free to leave a comment here or on our business Facebook page! Good luck!!!


e.jpg)
e.jpg)
e.jpg)